


My daughter felt a little left out, as it was really Ethan's Lemonade stand...so she came up with the idea she could sell cookies alongside her brother...opportunity strikes! Again after reading The Sweet Adventures of Sugarbelle and seeing the guest post for Lollypop cookies I figured this would be a perfect time to bake up some fun colourful cookies on sticks to share with the neighbourhood too.
Lollypop Cookies


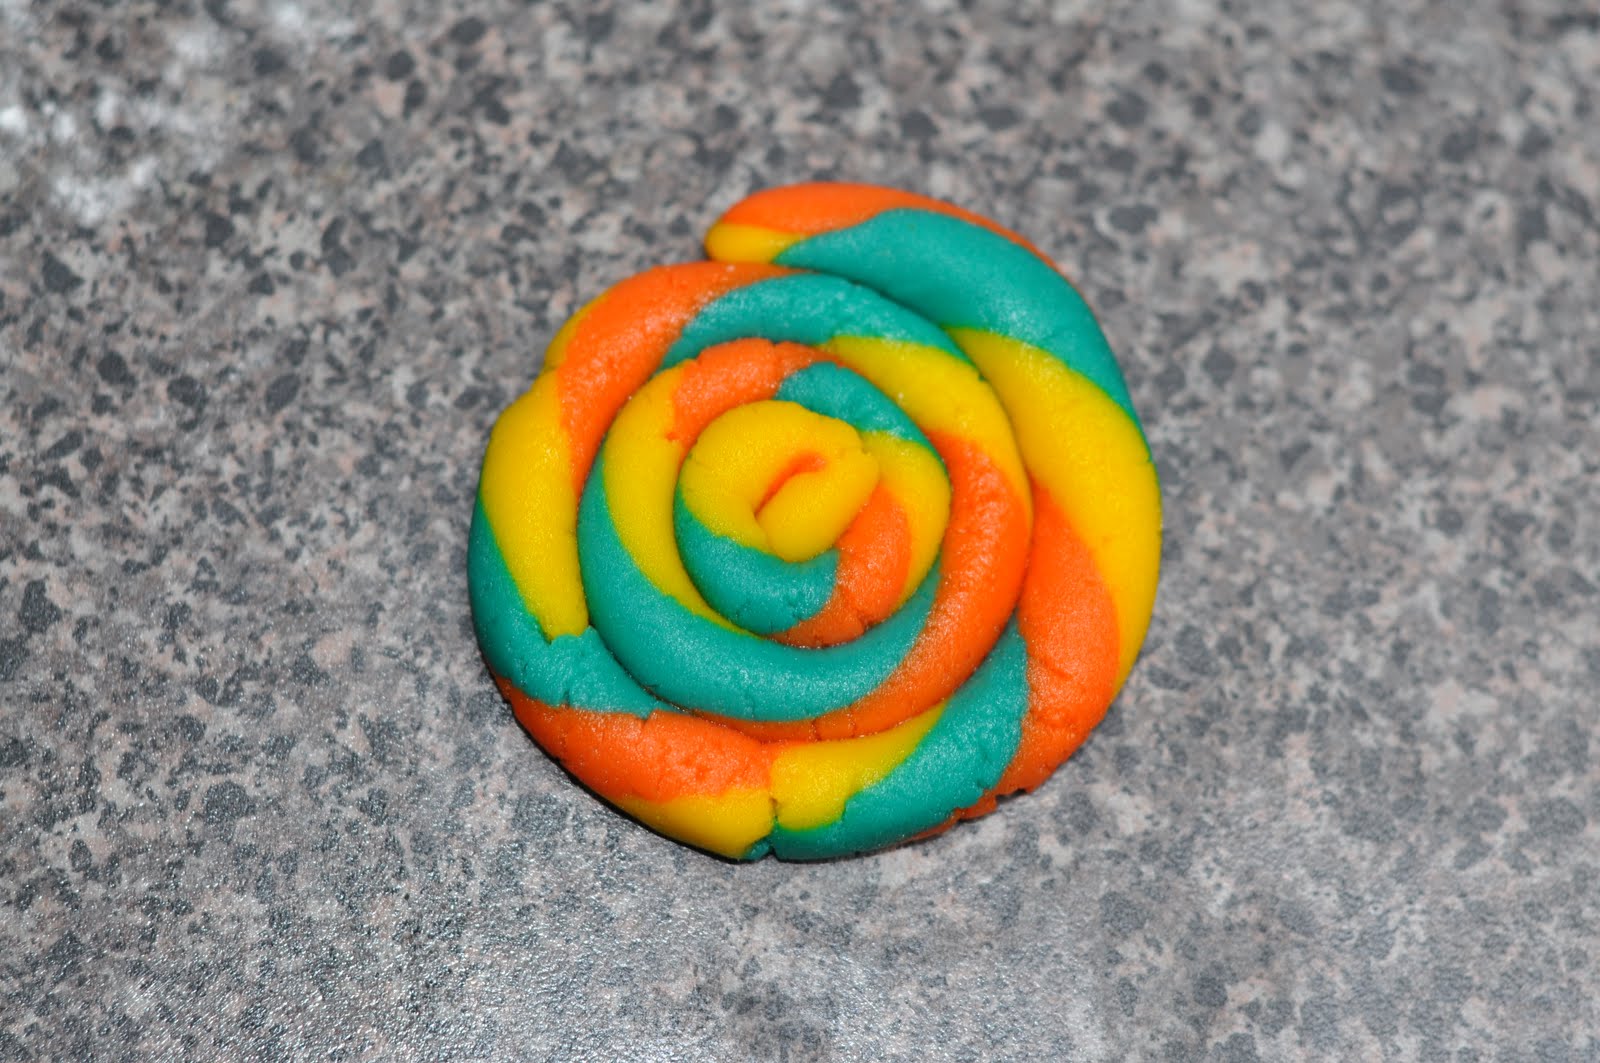
Section out your dough into 2 inch chunks and group them into tiny pyramids of 3 colours.

Gently work them toghether by rolling them using the palm of 1 hand first and then 2 to thin out your dough rope. Finally, twisted the 2 ends in opposite directions of each other to make the cane look swirled.

Starting with one end roll it up to form your lollypop wheel, then transfer it to a parchment lined cookie sheet using a spatula to aid in lifting and reduce distortion of your wheel.
Insert your cookie pop sticks (we had round lolllypop sticks). Then bake at 350 for about 10 - 12 minutes. Once finished, let them cool on a wire rack, package and sell or eat and enjoy!


No comments:
Post a Comment