Monday, July 30, 2012

Monkey Birthday Party

It's no secret I am HUGE fan of Paperglitter parties. So, this time around for Avery's 8th birthday we threw together the Monkey Party designed by no other than Linnette over at Paperglitter.


I decided {as a thrifty mama} to go with the basic monkey kit only because I also have a son...who does not like girly stuff like hair bows and flowers.  This decision allowed me to also use this kit for him should he decide to "Go Bananas" for his own birthday later this year.  And, for once - my blah-blah brown walls actually accompanied the overall party decor quite nicely.

For the occassion, I got straight to baking - but I didn't go overboard...just four different treats for the guests to enjoy.

Like banana cupcakes with swiss meringue buttercream...


 Cool grease proof cupcake wrappers were purchased from Golda's kitchen, the colours lent themselves perfectly to the overall scheme and were decked out with a combination of rounds from the party kit and monkey heads {Monkey'n Around} from Party Stuff.


A two tiered cake with polyer clay monkey keepsake topper and a colour palette drawn from the colours in the kit (plus a pale blue as our extra accent colour)...


The leaves and number 8 on the cake were made from a blend of fondant and gumpaste so they would firm up {and were made 3 days in advance of the cake being assembled). Then, using an edible food writter, the leaves were detailed to reflect the leaf decor in the kit.  The monkey was also made by me {something else I've been doing for a while...okay - years...like about 20!}


Bakerella inspired monkey cake pops with paperglitter flare ... designed by MOI!


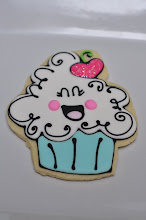
and of course...SUGAR COOKIES - no party here goes without sugar cookies. We jazzed up half of them with 3/8" satin tied bows for the little ladies and the gents got the original monkey.


I tried using a new technique I picked up from one of my other favorite reads on the net which made for perfect outcomes like the sugar cookies.

Over at The Sweet Adventures of Sugarbelle, Callye posted a tutorial using a "push pin" technique to accurately mark flat iced cookies so that the details would be picture perfect {in her example she uses LEGO man heads to illustrate this method}.  I think I did pretty darned good if I don't say so myself :). Although it was slightly time consuming, it was well worth the work, as the results couldn't have turned out any better in my opinion. Originally, I began by using a quilt marker pin with a large round head on it, but after a while my fingers began to get sore from gripping something so small...so I thought outside the box - "what else do I have that could poke holes into the icing?" .  Then it came to me....my paper perferator from my makin' memories scrapbook kit. It resembled a stylus, was much easier to hold and gave just as accurate marks in the royal icing.


 After the cookies were finished some were bagged and topped with the treat bag toppers from Linnette's party kit.

Water bottle labels were repurposed into bubble wraps...


Cupcake topper rounds were reduced in size at printing and turned into tokens to adorn the cutlery wraps with pipecleaner monkey tails, and the treat bag flags were re-invented into soda pop bottle decor. Avery scattered the leftover tokens all over the table like confetti! What a smart cookie!


and the bunting banner was sewn together for durabilty and was a huge time saver. {I stacked the words with the last letter on the top of the pile from the sentiments to ensure the banner did not come out backwards}.  We couldn't have "YADHTRIB YPPAH" now could we?  Then we inserted some leaf cutouts randomly and a monkey too for added cuteness and personality.


More leaves were fastened to the other trays and displays to pull through the theme.


And we can't forget the treats for the little monkeys that were at the party! I used the editable text fields to personalize each treat box for all the children that attended, and added eyelets with a grosgrain ribbon handle for easy carrying on the way out. 


...and don't forget the sugar cookies!


Although the party took quite a few hours to put all together {from strategically planning the baking projects to print runs for the week leading up to party day} it was well worth the effort. I thouroughly enjoyed doing it {when do I not?}. 

Enjoy!


Monday, July 16, 2012

Baker Gets Burned


So, I am usually sleeping by now but tonight I am fueled with a little different insight into what I do and why I do it.  Baking is my passion, I love to dream and create new works of edible art that bring smiles and aw to their consumers faces. But, it saddens me to find out that my artwork has been taken from me {it's rightful owner} without request or permission granted first.  Going through school it was ingrained in me about piracy when writing literary papers.  CITE,...CITE ...CITE.  I just expected that all other people out there too would be as honest as me.

Today, for some reason a conversation I had with an acquaintance surfaced in my mind about an incident she found herself faced with.  Her artwork was being plagiarized and pawned off as somebody Else's, no credit given and no permission to use it asked.  It baffled me to try and wrap my head around what people were thinking, and tried to place myself in her shoes. What would I do if it were me?

Today, I found out.  IT ROYALLY SUCKED!  I felt anger, sadness, stupidity...It made me question everything I do, and whether or not to persevere and continue to pursue my passion of baking in general, but more specifically decorative cookie making.  It was a gamble, I posted some of my cookies...and they got into the wrong hands.  It was the hands that followed that made me sad though. There didn't appear to be any questions asked as to where the image came from, I just happened to locate it myself in a google search. And now I wonder how many more cases like this are there.

I have put up a guard surrounding my personal creations, with limited visibility to a community I believe will truly respect my cookies as my personal property and will use them as inspiration and inspiration only.  They will not reproduce them for resale to make a quick buck, and they will certainly consider asking permission first to use a design before proceeding to bake them. And they will always give credit where credit is due.

So, if you are a flickr fan of my stream and you can no longer access some of my images it is for this reason.  I have left available some of the items that are visible here on my blog.  I apologize for this inconvenience but I believe deeply in my heart it is what I need to do to help protect my livelihood and passion.

Thank-you for your understanding. I hope you will continue to read my posts and be inspired by what I have to offer to you.

{PS. this cupcake cookie image is copyright protected and is the property of yours truly}


Saturday, July 7, 2012

Rainbow Layer Cake


With school winding down, it meant time to celebrate a successful school year for both my children. As previously posted, the ice cream cone cupcakes were the item of choice for my son's kindergarten class, and now my daughter selected rainbow cake to serve her fellow classmates.

I was super stoked to have another opportunity to prepare this super colourful six layer cake for her grade 2/3 split class.  It was a total show-stopper! The kids loved it, the presentation turned into a question and answer session {the perfect opportunity for my little squirt to practice speaking french, and a chance to me to see her do what she's been studying for the last three years}. Confirmation that my faith in the school's staff and the leaving my child's education in their hands has paid off :)

Unfortunate for me, I only have 2, 8" cake pans so the baking of the colourful treat was quite timely. The end result made it all worth while though!  Note to self: Indulge, buy more cake pans.

So, I first saw this delectable cake on a Pinterest post by Sweetopolita...we gave it the first run back in March for my Dad's birthday. It was good, but we didn't get any pictures and to be honest, it was filled with whipped topping {not the same as a good swiss meringue buttercream}.  THIS cake was the cat's meow!


You can find the instructions on how to make it {Sweetopolita's doodle cake, not Avery's Class cake...this was an original made by me } on Sweetopolita's blog, just follow this link here.  Avery wanted to make it representative of school, so we topped the tower of cake with fondant covered, rice krispie treat apple decked out with the resident worm.

Enjoy!